 Save to Pinterest
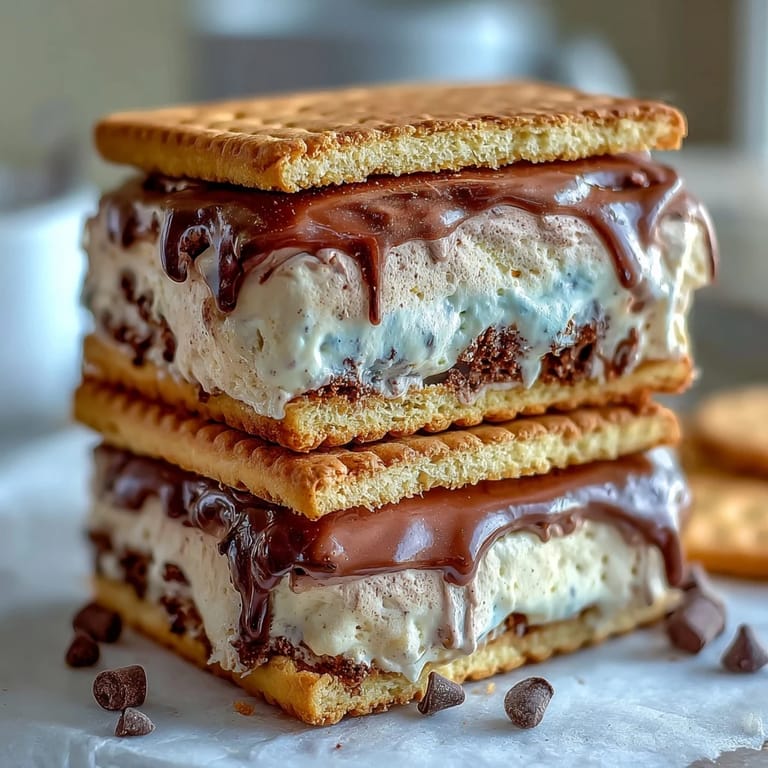
 My roommate texted me a photo of a Frappuccino with the caption "this but as ice cream sandwiches" and somehow that random text became an entire afternoon project. The idea stuck because it felt impossible at first—how do you capture that cold, creamy coffee shop magic in something homemade? Turns out, it's simpler than you'd think, and the result tastes like summer decided to become an actual dessert.
I made these for a dinner party last summer and watched my very critical friend—the type who orders espresso at 8 PM without flinching—take one bite and just close her eyes. She didn't say anything for a solid ten seconds, which honestly felt like the highest compliment possible. That moment made me realize this dessert does something special: it bridges the gap between "I need coffee" and "I want something sweet," and it does both at the same time.
Ingredients
- Unsalted butter (1 cup): Use the good stuff here because it's the foundation of tender cookies—and please let it soften at room temperature, not in the microwave unless you enjoy the texture of shortbread that got sad.
- Light brown sugar and granulated sugar (1 cup each): The combo gives you molasses depth plus sweetness, which matters when you're competing with bitter espresso flavors.
- Large eggs (2): Cold eggs will seize up your butter, so if you forgot to pull them out earlier, run them under warm water for a minute.
- Instant espresso powder (2 tbsp): This is non-negotiable—it's what makes these actually taste like a coffee drink instead of just regular cookies with a hint of regret.
- Vanilla extract (1 tsp): The real stuff makes a difference here since vanilla is playing a supporting role to espresso.
- All-purpose flour (2 1/2 cups): Measure by spooning into a cup and leveling off, not by scooping straight from the bag, which always gives you too much.
- Baking soda and salt (1 tsp and 1/2 tsp): These are tiny but mighty—baking soda helps the cookies spread and brown nicely at the edges.
- Heavy cream (2 cups): The higher the fat content, the silkier your ice cream will be, so don't cheap out here.
- Whole milk (1 cup): This lightens things up and keeps the ice cream from being too dense to enjoy between cookies.
- Granulated sugar for ice cream (3/4 cup): This sweetens the base without adding any competing flavors.
- Vanilla bean pod or paste: If you're using the pod, split it lengthwise and scrape out those tiny black seeds—that's where all the vanilla flavor lives, and the visual appeal doesn't hurt either.
Tired of Takeout? 🥡
Get 10 meals you can make faster than delivery arrives. Seriously.
One email. No spam. Unsubscribe anytime.
Instructions
- Warm the ice cream base gently:
- Combine milk, sugar, vanilla seeds, and salt in a saucepan and warm it over medium heat until steam rises and the sugar dissolves completely, which takes about five minutes. Don't let it boil or you'll scramble the milk proteins and end up with grainy ice cream, which is a tragedy you can prevent by just watching the pot like a parent watching a kid on a diving board.
- Cool and chill thoroughly:
- Pull the pan off the heat, fish out the vanilla pod if you used one, then let it sit at room temperature until it stops steaming. Stir in the heavy cream and shove the whole thing in the fridge for at least two hours—this waiting period is non-negotiable because cold bases churn into smoother ice cream.
- Churn and freeze your ice cream:
- Follow your ice cream maker's instructions (they vary wildly), then spread the soft ice cream into a parchment-lined 9x13-inch pan to about 3/4-inch thick. Get it into the freezer for at least two hours, which is enough time to organize your life a little bit.
- Preheat and prepare for cookies:
- Crank your oven to 350°F and line two baking sheets with parchment paper so your cookies don't stick and turn into some kind of kitchen disaster. This setup takes two minutes and saves your entire afternoon.
- Cream butter and sugars until fluffy:
- Beat the softened butter, brown sugar, and granulated sugar together in a large bowl for about three minutes—you want it to look pale and airy, which means you've incorporated enough air for the cookies to have that tender, bakery-quality crumb. This is also the moment when your kitchen starts smelling like buttered toast, which is how you know you're winning.
- Add eggs, espresso, and vanilla:
- Beat the eggs in one at a time, then add the espresso powder and vanilla extract and mix until everything is fully combined. The mixture should look rich and slightly darker than plain cookie dough because of the espresso.
- Combine dry ingredients separately:
- In another bowl, whisk together flour, baking soda, and salt, which only takes a minute but prevents lumps and uneven rising. This is the boring step that nobody talks about but that actually matters.
- Bring wet and dry together gently:
- Pour the dry mixture into the wet mixture and fold or stir until just combined—overworking the dough at this point makes cookies tough. You're looking for that moment when the flour just disappears and everything comes together.
- Portion onto baking sheets:
- Drop rounded tablespoons of dough onto your prepared sheets and flatten each one slightly into a 2.5-inch round. Leave about an inch between them because they'll spread a tiny bit.
- Bake until edges are set:
- Bake for 10 to 12 minutes—the key is catching them when the edges are firm but the centers still look slightly underbaked, which sounds wrong but creates that soft texture that won't crack when you bite into a frozen sandwich. When you pull them out, they'll keep cooking slightly from residual heat, so don't overbake.
- Cool completely before assembly:
- Let the cookies cool on the baking sheet for five minutes, then transfer to a wire rack until they're room temperature. Warm cookies meet frozen ice cream and nothing good comes from that union.
- Cut ice cream rounds to match:
- Using a round cutter that matches your cookie size, cut the frozen ice cream slab into rounds. This happens fast because you don't want the ice cream melting all over your counter.
- Build your sandwiches:
- Place one ice cream round on the bottom of a cookie, press another cookie gently on top, and try not to laugh at how perfect they look. These are ready to go straight into mouths, but if you're being fancy, freeze them again for 30 minutes.
 Save to Pinterest
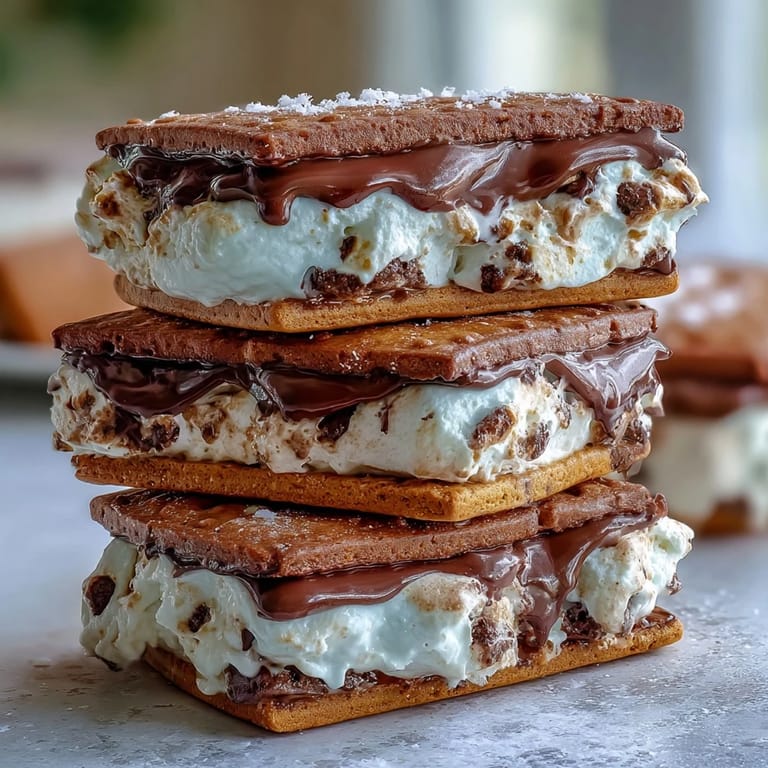
 There's a specific moment that happens when you bite through a cold cookie into that creamy vanilla center and suddenly taste actual espresso notes—it's the exact sensation those coffee shop drinks try to create, except it's cold and stays that way and tastes like you actually made something impressive. That moment is why this recipe exists.
The Coffee-to-Vanilla Balance
The espresso powder in the cookies does heavy lifting here—it's not meant to taste like a latte, but rather to create depth that makes the vanilla ice cream taste more vanilla-ish, which is a weird kitchen principle but absolutely true. I learned this by accident when I made a batch without enough espresso and everything tasted flat, like someone had described vanilla to someone who'd never tried it before.
Storage and Make-Ahead Magic
These sandwiches keep in the freezer for two weeks if you wrap them individually in parchment paper, which means you can make a whole batch on a lazy Sunday and just pull them out whenever you want to feel like you actually have your life together. I've made these on Tuesday, forgotten about them until Friday, and still had perfect desserts ready to go.
Elevations and Variations
Once you get comfortable with the basic version, the fun part is making these your own—roll the sandwich edges in mini chocolate chips right before they finish freezing, or crush some coffee beans on top, or even dip the whole thing in melted chocolate if you're feeling absolutely wild. The base recipe is flexible enough to handle whatever you throw at it, and that's where the real kitchen confidence comes from.
- For extra texture, press crushed coffee beans, mini chocolate chips, or chopped chocolate-covered espresso beans into the ice cream edges before the final freezing step.
- If you don't have an ice cream maker, buy good quality vanilla ice cream and let it soften slightly before spreading it into the pan—nobody will judge you.
- These work perfectly for summer parties because you can pull them out five minutes before guests arrive and they're still cold, which is basically adulting on hard mode.
 Save to Pinterest
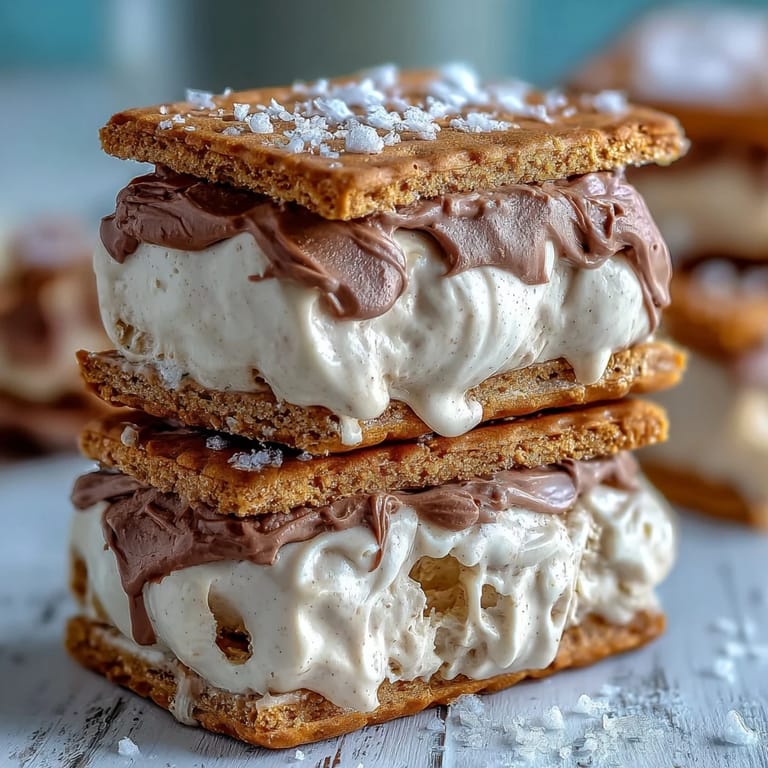
 These sandwiches turned what was a random text message joke into one of my most-requested desserts, which taught me that the best recipes often start as "what if" thoughts that you actually decide to make. That's the whole point of cooking at home—taking ideas that feel impossible and turning them into something real.
Recipe FAQs
- → How do I ensure the ice cream is firm enough to sandwich?
Freeze the churned ice cream in a shallow pan for at least two hours until firm, then cut rounds quickly before assembling.
- → Can I substitute espresso powder with instant coffee?
Yes, strong instant coffee works well as a substitute, providing a similar coffee flavor in the cookies.
- → What is the best way to store these sandwiches?
Wrap each sandwich individually in parchment paper and freeze up to two weeks for optimal freshness.
- → How do I get soft yet sturdy coffee cookies?
Bake until edges are set but cookie centers remain soft, allowing the right balance to hold the ice cream without crumbling.
- → Can I add toppings to the sandwiches?
Yes, rolling the edges in mini chocolate chips or crushed coffee beans enhances texture and flavor.