 Save to Pinterest
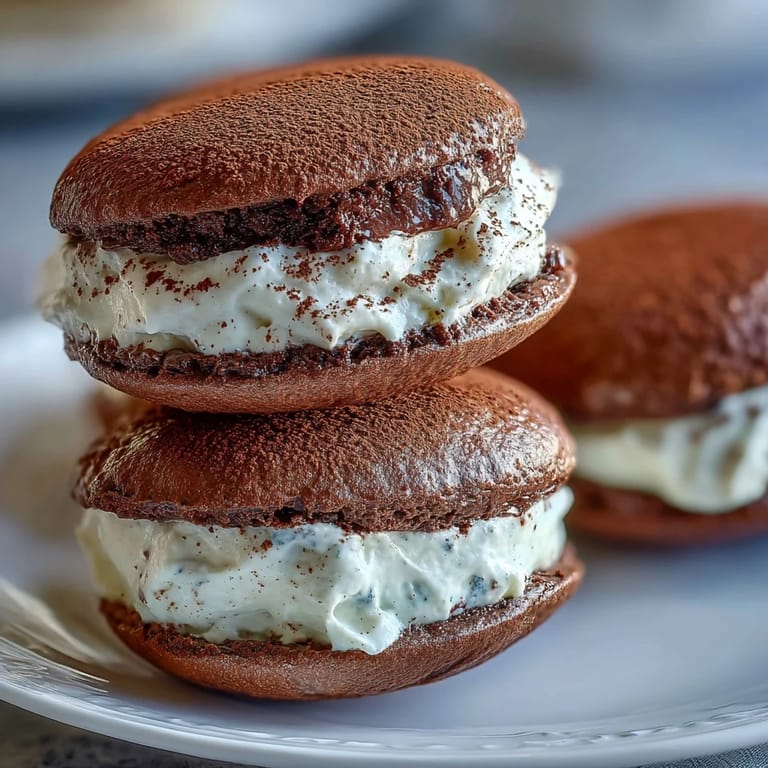
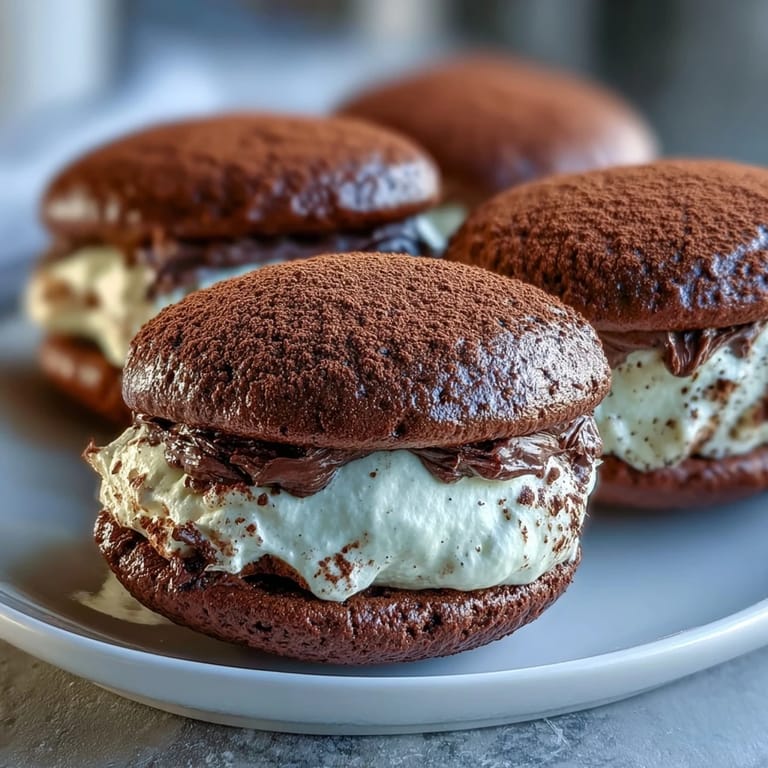
 My kitchen smelled like a bakery collided with a coffee shop the afternoon I first pulled these from the oven. I had been craving tiramisu but didn't want to fuss with ladyfingers and layering, so I grabbed my whoopie pie pan and decided to see what would happen if I married the two ideas. The result was a tray of pillowy chocolate cookies that tasted like a hug from an Italian grandmother, minus the guilt of eating dessert for breakfast.
I brought a batch to a potluck once, and my friend Sarah, who swears she doesn't like coffee desserts, ate three before admitting she was wrong about her own taste buds. Watching someone's face change from skeptical to blissed out is one of the great joys of baking. These cookies have that effect on people, the kind that makes them go quiet for a moment while they figure out what just happened in their mouth.
Ingredients
- All-purpose flour (210 g): The backbone of your cookie structure, keep it measured correctly or you'll end up with hockey pucks instead of pillows.
- Unsweetened cocoa powder (55 g): Use the good stuff here, Dutch-process gives a deeper flavor, but natural works too if that's what you have.
- Baking powder and baking soda: This duo gives the cakes their signature dome and tender crumb, don't skip the soda or they'll be dense.
- Unsalted butter (115 g), softened: Let it sit on the counter until your finger leaves an indent, this makes creaming with sugar actually possible.
- Granulated sugar (200 g): Creaming this with butter creates air pockets that make the cookies light, so give it a good few minutes with the mixer.
- Whole milk (240 ml): The fat content matters here, skim milk will make sad, dry cookies that nobody wants.
- Mascarpone cheese (225 g), chilled: The star of the filling, it's richer and less tangy than cream cheese, which is exactly why tiramisu tastes like tiramisu.
- Heavy cream (120 ml), cold: This whips into the mascarpone to make it spreadable and cloud-like, warm cream won't whip so keep it cold.
- Instant espresso powder (1 tablespoon): Dissolve this in hot water first or you'll have gritty filling, I learned that the hard way on batch number two.
- Powdered sugar (60 g), sifted: Sifting prevents lumps in your filling, and nobody wants to bite into a sugar clump mid-swoon.
Tired of Takeout? 🥡
Get 10 meals you can make faster than delivery arrives. Seriously.
One email. No spam. Unsubscribe anytime.
Instructions
- Prep Your Oven and Pans:
- Preheat to 350°F and line your baking sheets with parchment, this keeps the bottoms from getting too dark while the tops finish baking. Trust me, burnt bottoms ruin the whole vibe.
- Mix the Dry Ingredients:
- Whisk the flour, cocoa, baking powder, baking soda, and salt together until there are no streaks of cocoa left. This ensures every cookie gets an even rise and flavor.
- Cream Butter and Sugar:
- Beat them together for about three minutes until the mixture looks pale and fluffy, this is where the magic starts. Scrape down the bowl halfway through so nothing hides at the bottom.
- Add Egg and Vanilla:
- Beat these in until fully combined, the batter should look smooth and slightly glossy now.
- Alternate Dry and Wet:
- Add about a third of the flour mixture, then half the milk, then another third of flour, the rest of the milk, and finish with the last of the flour. Mix just until you can't see any dry streaks, overmixing makes tough cookies.
- Scoop and Bake:
- Drop 24 even mounds onto your prepared sheets, giving them space to spread slightly. Bake for 10 to 12 minutes until they bounce back when you gently press the tops, then cool completely on a rack.
- Make the Filling:
- Dissolve the espresso powder in hot water and let it cool while you beat the mascarpone, cream, and powdered sugar until thick and smooth. Stir in the cooled espresso and vanilla, then chill if it's too soft to spread.
- Assemble the Pies:
- Spread or pipe a generous amount of filling on the flat side of half the cookies, then sandwich them with the remaining halves. Press gently so the filling reaches the edges without squishing out.
- Dust and Chill:
- Use a fine sieve to dust the tops with cocoa powder, then refrigerate for at least 30 minutes. This helps the filling set and makes them easier to eat without creating a mascarpone landslide.
 Save to Pinterest
 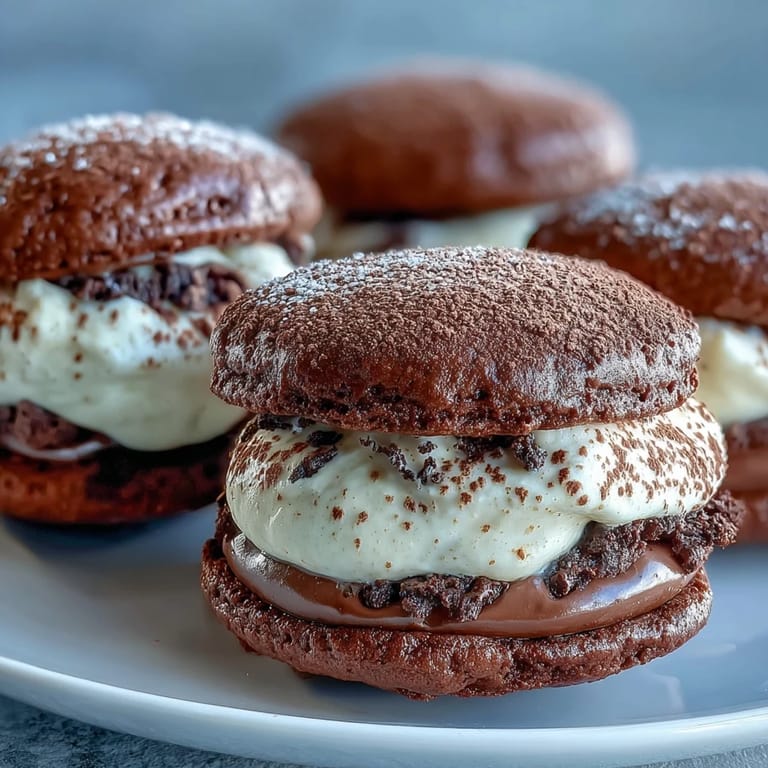 Save to Pinterest
 The first time I served these at a dinner party, my cousin asked if I had secretly trained at a pastry school. I hadn't, but I let her believe I was more talented than I actually am for a good ten minutes before confessing it was just a really good recipe. That's the thing about these whoopie pies, they look and taste like you spent hours in the kitchen, but the actual work is simple and forgiving.
How to Store and Serve
Keep these in an airtight container in the fridge for up to two days, though I've never had a batch last that long. The cookies stay soft and the filling stays firm, which is the perfect texture combination. If you want to get fancy, you can add a tablespoon of coffee liqueur to the filling for a grown-up twist that makes them taste even more like the real tiramisu deal.
Make Ahead Magic
You can bake the cookies a day ahead and store them unfilled in an airtight container at room temperature, then whip up the filling and assemble them a few hours before serving. This trick has saved me more than once when I needed to look like I had my life together for a party. The filling also freezes well if you want to make a double batch and save half for another time.
Tips for Perfect Texture
The key to soft, cake-like cookies is not overbaking them, pull them out when they just barely spring back and they'll finish setting as they cool. If you bake them until they look completely done in the oven, they'll be dry by the time they hit room temperature.
- Use a cookie scoop for evenly sized cookies that bake at the same rate, eyeballing it leads to some being overdone while others are still raw.
- Let the batter rest for a minute after mixing, this helps the cocoa powder fully hydrate and makes for a smoother, richer cookie.
- Chill your mixing bowl and beaters before whipping the filling, cold equipment helps the cream whip faster and hold its shape longer.
 Save to Pinterest
  Save to Pinterest
 These whoopie pies are proof that you don't need a fancy occasion to make something that feels special. Bake them on a random Tuesday and watch how quickly an ordinary evening turns into something people will text you about a week later asking when you're making them again.
Recipe FAQs
- → Can I make the whoopie pies ahead of time?
Yes, you can bake the chocolate cookies up to 1 day ahead and store them in an airtight container. Prepare the filling and assemble just before serving for the best texture and freshness.
- → What can I substitute for mascarpone cheese?
Cream cheese can be used as a substitute, though it will create a tangier, less authentic tiramisu flavor. For best results, use full-fat cream cheese at room temperature and beat it until very smooth before adding other ingredients.
- → Why is my filling too runny?
Overmixing the mascarpone and cream can cause the filling to become thin. Beat just until smooth and combined, then chill for 20-30 minutes to firm up before assembling the whoopie pies.
- → Can I use regular coffee instead of espresso powder?
Instant espresso powder provides concentrated coffee flavor without adding excess liquid. If using brewed coffee, reduce it to 1 tablespoon of very strong, cooled coffee to avoid making the filling too thin.
- → How should I store assembled whoopie pies?
Store in an airtight container in the refrigerator for up to 2 days. The mascarpone filling requires refrigeration. Let them sit at room temperature for 10 minutes before serving for optimal texture and flavor.
- → Can I freeze these whoopie pies?
The chocolate cookies freeze well unfilled for up to 1 month. However, the mascarpone filling does not freeze well due to its dairy content, which may separate upon thawing. Assemble fresh for best results.